Inter-generational activities
 Now that autumn is finally here, it is the perfect time to get outside and do a fall-themed activity with your kids or grandkids. We call this one Leaf Identifying Game. Have the children pick out their favorite colorful leaves to collect and carefully put them in a basket or bag so you have something to transport them in. Then when you get home, spread out all the leaves on a large table. Have the kids sort them out by type, color and size. Pick out your favorites in each of the three categories. Then look online to find the names of the leaves you’ve gathered and the specific trees they came from. You can also preserve these by putting them between two sheets of waxed paper (wax side touching leaves on both top and bottom) and ironing for 30 seconds on medium heat.
 There are homeless individuals and families in most cities and towns across America. Many of us have become complacent and unaffected when we stop at a light or pass a corner and see a homeless person. Our kids and grandchildren see this and have questions and concerns.
A great way to get kids involved in this issue and use as a teachable moment, is to have them make Care Packets. These are prepared bags with toiletries, non-perishable food and clothing items. Keep them in your car or carry them in your purse so you can hand them out when the need arises. You may want to have separate male, female and children bags for specific items.
Gather objects and have the kids help pack them in gallon Ziploc bags. You may want to include notes of encouragement for a more personal touch. Here are some suggestion of items to include in the bags.:
Items
Travel size shampoo, conditioner and lotions
Travel size toothbrush and toothpaste
Travel size mouthwash
Liquid or bar soap
Hand wipes
Hand sanitizer
Tissues
Comb/brush
Tampons/sanitary napkins for women
Band aids
Pocket rain poncho
Socks
Gloves/mittens
Granola bars
Nuts
Gum
Coins or small amount of money
Small toys for children
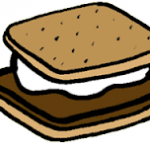
Summer S’mores
August 10th is National S’mores Day and the perfect excuse to eat Summer S’mores with the special children in your life. S’mores are the ultimate summertime snack and loved by all generations. The best way to make these are over an open campfire outdoors. But if that is not an option, you can cook these over your indoor stove or as a quick-melting treat in your microwave. The real fun is assembling all the ingredients and eating this gooey dessert with those you love. Maybe even spread out a blanket outdoors and gaze out the stars while eating. This could be your new summertime tradition for years to come.
Ingredients
Graham Crackers – (one on top/one on bottom)
Marshmallows – (pick the size you like)
Chocolate (milk, dark, or any favorite)
Lots of napkins!!
 Summer is the perfect time for children to visit their local library. Many branches have special reading activities to keep kids engaged while they are on vacation. Whether there is an available planned program or not, you can make your own library activity to share with your grandchildren. Start a “Book Adventure” with a child this summer. Go with them to the library as they choose a book that they are interested in.
Next find a comfy quiet area at home that will serve as a reading spot. Take turns reading parts of the book, using character voices and animated tones. Then jot down discussion questions that you can answer and share together after you are done. Make it like your own private book club. Do multiple books over the summer if they enjoy it and time allows.
Mini Herb Pots
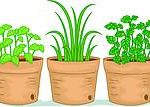 There is a renewed interest in gardening that is showing up in many areas across the US. While many kids today are unable to experience the pleasure of having a backyard garden that can grow lots of herbs and vegetables, they can try gardening on a much smaller scale. Introduce herb growing to the kids in your life with this month’s inter-generational activity called Mini Herb Pots.
Materials
Small Flower Pots (with good draining)
Soil
Herb Seeds or Plants
Hand Gardening Tools
Popsicle Sticks (Plant Markers)
Paints/Markers to decorate
Find out what herbs that the children enjoy ahead of time. Easy favorites are basil, mint and cilantro. Next, go down to your local home improvement store and purchase some small inexpensive flower pots. For more successful results, you will want the ones that have good drainage. For the herbs themselves, you can either get seeds or plants. Sometimes plants are easier for kids to get excited about since they don’t have to wait to use them. Include the children in researching how to plant and care for their herbs (sunlight, watering, pruning, etc.). Then plant and find the best spot to place the pots. Then let the kids write the names of their herbs on the popsicle sticks and decorate.
Make sure to prepare some recipes with the kids using the herbs they grow so they get a real feel for the “food to table concept.” You could even take things a step further and grow fruits and vegetables with your kids and grandkids depending on where you live. You will be teaching them that food comes out of the ground and takes a lot of love and care. It doesn’t just magically appear on the shelves at the grocery store.
Fruit Garland
Now that the weather is warmer, it is the perfect time of year to get the kids and grandchildren involved in feeding the birds in their yard. You can make homemade Fruit Garland to hang on trees so the birds have something to munch on. The materials you will need are:
Materials
Fishing line or upholstery thread
Scissors
A large-eyed needle
Thimble for smaller hands
Fresh Cranberries
Dried apple slices
Cheerios
Freshly popped popcorn (plain – unsalted and unbuttered)
Have the children thread the fruits, cereal and popcorn onto the string/wire in fun patterns. Smaller children might need to use a thimble for safety. You can make various lengths of string for different trees and different sized-birds. Place finished products on tree branches with some sections hanging down. Early mornings are the best “watching” hours and kids could be enjoying their breakfast while their feather friends enjoy theirs!
Easter bonnets were always such a visual symbol of the beginning of spring. While this style is not as popular today, bring back this tradition by making Beautiful Bonnets with your kids and grandkids. You can get most of the materials needed at your local dollar store, so this is very affordable.
Materials
Plain inexpensive hat (sunhat, baseball hat, visor or any other style you find)
Glue gun/glue sticks
Beads, feathers, pipe cleaners, birds, sequins, ribbons, etc.
Glitter, paint and markers
Spread out some newspaper on your table and take out all your materials. Have the children pick out a hat and choose a theme they would like to style their hat after. Supervise as they put together their creations (especially if using a glue gun). Make one for yourself too. You can even model your hats in a impromptu parade and take pictures to share with friends and family.
Local Exploration
 Most of us don’t really take the time to explore our local community unless we have visiting guests that we need to entertain. No matter where we call home, there are fun spots and areas of natural beauty that make the locale unique.
A great activity to share with your children or grandchildren is to set aside a day to check out the wonders of your neighborhood. We call this a Local Exploration. Have the children help with you in the planning of your special exploration. First sit down and go online to see what offbeat and different sights and activities your town has to offer. Make a list of places that sound good and be sure to include fun spots to eat so you can partake in the local cuisine. Depending on where you live, you may need to plan more than one exploration day if you find an abundance of interesting ideas. Be sure to take lots of pictures to document your findings and put them in a mini-scrapbook to share with your young explorers.
 We all have people in our lives that could use a special showing of love and encouragement. This Valentine’s Day can be the perfect opportunity to share your thoughts with someone by making them a Special Valentine Card. You can Involve your children or grandchildren in this craft to make it a family activity.
First, sit down and write out a list of who would make the best recipient. Perhaps it is an older neighbor, a friendless child or someone who has recently suffered. If you find that you have multiple people in your life that could use some kindness, make multiple cards.
Second, get out the art supplies suggested below needed to make your masterpiece. Sit together at a table and create the perfect card to express how much this person means to you. Make sure to include words explaining why they were chosen. Either hand deliver your card or put it in the mail. Either way, you are sure to make someone’s day by putting a smile on their face. This activity is a fun way to show kids how easy it is to reach out and show kindness.
Supplies
Colorful Construction Paper
Pens, Pencils, Markers or Paint
Glue, Tape or Staple Gun
Glitter
Stickers
Coat Giveaway
 The winter is the best time of year to teach the children in your life about being thankful for what they have. As the temperatures drop, the homeless population in cities and towns across America have a need for coats and jackets to help them get through the brutal winter months.
An easy way to get kids involved in helping is to set up a Coat Giveaway in your community. Contact friends, family and coworkers to donate used coats and jackets they no longer wear and put them in a box. Call your local homeless shelter or social service organization and arrange a way to either drop off the coats or have them picked up. If your child or grandchild can go and drop them off with you that is even better. They will get to see “hands on” the difference they are making to those less fortunate.
 The Holiday Season is a wonderful time of the year to brighten up someone’s day and make them feel special. While we may have family and great friends around that are a part of our holiday festivities, there are others who spend this time alone. Why not seek somebody out in your community that could use some holiday cheer this December?
This is a perfect activity to share with your children or grandchildren. Pick a friend, neighbor, church member, or co-worker in your area and become their “Secret Santa.” Get a pad and paper and list the things that they may need (whether actual gifts or services you could provide). Pick a budget and decide what to include in your gift. Flea markets and dollar stores are perfect for getting the most for your buck.
You could put items in a homemade basket or wrap individual gifts. If you are giving services, make up coupons and decorate them to match what is being offered. If you want to include food items, be sure to find out about dietary restrictions and preferences. You may want to add a stocking to fill so they have something to hang up and look at as a reminder of their special friend. The options are endless and are as individual as the person you are buying for. The best part of this activity is showing children just how much more fun it is to give than receive. That is something they will remember for life!
Operation Gratitude began in 2003 as an organization whose mission is to thank veterans, first responders, new recruits, wounded soldiers and their caregivers for their service and sacrifice. One of the many programs they provide is gathering and handing out care packages to these deserving groups.
A meaningful Thanksgiving activity to do during this special time of year is getting the whole family involved in putting together these packages. To find out more specifics about this program, visit Operation Gratitude’s web site @ https://www.operationgratitude.com/wishlist/. To get started, they have set up the following “Wish List” of items to include in your care packages or kits. Please note the specific restrictions and guidelines on their website for items you include.
Knit or Crocheted Scarves and Hats
Cool-Ties/Bandana Coolers/Neck Gators
Paracord Survival Bracelets
Beanie Babies, Webkinz, Amigurumi, or other Small Plush Toys (6 inches or smaller)-
Socks (preferably black, brown, green, tan; not white)
DVDs and CDs, Video Games, iPods, Computer Flash Drives,
Lip Balm (with extra seal)
Roll-on Deodorant
Hand and Foot Warmers
Individually-packaged Razors
Pens and Pocket-sized Notebooks or Spiral Pads
Shaving Cream (gel or cream based only)
Moist Towelettes (individual packets)
Dental Products (toothbrushes, toothpaste, floss, mouthwash – all travel-sized)
Travel-sized Board Games
Handheld Electronic Games
Mini Battery-Operated Fans
Travel-sized Containers of Foot Powder
Screen-Printed T-Shirts, Baseball Style Caps, Gloves
Holiday and Celebratory Occasion Greeting Cards (unused)
Unsealed Personal Cards and Letters
Used Cell Phones, Video Games and Gaming Systems, iPods, PDAs, Inkjet Cartridges for recycling
Yarn (for our knitters to make scarves)
Gift Cards to chain stores such as supermarkets, drugstores, Walmart, Target, or VISA, MasterCard, American Express
Scary Halloween Bowl
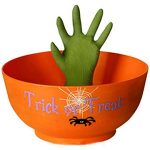 Impress this year’s trick or treaters by giving out candy from an easy-to-make Scary Halloween Bowl. Have your grandkids help in the design of the bowl to make it a true family activity. First you will need to inflate a white surgical or rubber glove and tie it at the bottom (making sure to leave yourself enough so you have ample amount to later attach to the bottom of the bowl).
The next step will depend on if you want to make your hand look like a monster or a skeleton. For the monster look, paint the glove a greyish-green color. You could add black to the fingernails to give it a more macabre feel. For a skeleton, paint the entire glove with black paint. When dry, take out a skinny paint brush and paint thin lines down each finger and across the knuckles so it resembles a skeleton hand. Put whichever glove you make aside and be sure to have it dry completely. Next take out the rest of the paints and paint brushes and decorate the outside out your bowl in whatever Halloween theme you prefer. If you wish to also paint the inside of the bowl, just make sure all the goodies you are giving out are wrapped. When everything is completely dry, affix the glove to the inside of the bowl securely with duct tape so the skeleton hand stands upright from the middle. Fill your bowl with candy/treats/goodies and when your trick or treaters arrive, wiggle it so the skeleton hand appears to be alive!
Supplies
Clear inexpensive large plastic bowl (from your local dollar store or flea market)
One white surgical or rubber glove
Paint (you can buy glow in the dark to create an even spookier effect)
Paint brushes, cups and water for painting
Duct tape (they sell many colors and designs – match it to blend in with the design of your bowl)
 It is the perfect season to make your kitchen or dining room table celebrate the cooling temperatures by creating Fall Leaf Placemats. This is a fun and easy project for both kids and adults. First go on an outdoor scavenger hunt to pick out the autumn leaves you want to use. Then put some newspaper or table covering out to protect your working service. Have each person grab a piece of construction paper and choose leaf shapes to be included on their mat. Lay out the design and paint the bottom of each leaf and press down on the paper (paint the rough side with the veins to get the greatest detail). You can also write names or messages on the mats to make them even more personal. Let the placemats dry before adding contact paper. These look especially festive for your Thanksgiving table!
Supplies
White Construction Paper
Assortment Of Autumn Leaves
Paint (you can choose only fall colors or all different shades)
Paint Brushes
Pens, Markers For Writing
Clear Contact Paper
Fifty-Fifty Self Portrait
A great and easy art project to do with kids is to have them create their own Fifty-Fifty Self Portrait. It is even more fun to do one of yourself too. You will need a large photo of your child or grandchild that you will be altering. Cut the photo in half right down the middle and attach it to a white/light colored piece of construction paper. The child then ‘re-creates” the missing half of the picture by drawing with the colored pencils (pencils are more forgiving than magic markers since mistakes can be erased). Hang these masterpieces afterwards for everyone to see!
Supplies
Large photo
Scissors
Tape/Glue
White/Light Colored Construction Paper
Colored Pencils
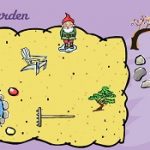 Wouldn’t it be great to always have the beach close by? While most of us can’t afford the real estate costs associate with beach front property, we can enjoy a miniature version by creating a tabletop Beach Zen Garden. This is a great intergeneration activity and kids will love picking out summertime decorations to include in their creation.
First go to your favorite beach to pick out some of the materials you want to include. You will need a jar to collect sand and a container to transport some small shells. Clean and rinse the seashells and pick out any dirty debris from the sand. Get a flat tray with sides to serve as your “beach” area (some take-out type containers work well). Pour the sand into your container making sure there is room to move around the sand without it overflowing from the top. Add your small seashells. Depending on how fancy you want to get, you can add other beach-related items to make it more festive. Some examples are doll outdoor furniture, fabric to look like beach towels or blankets and miniature beach balls or sand toys. You can even put together a tiny Adirondack chair with painted popsicle sticks if you are feeling extra creative. The real relaxing feature of a sand garden is to be able to move around the sand. Here be sure to include a plastic fork or tiny rake that will do the trick.
When those cold and bleak winter months come rolling in and start to wear you down, you will have your Beach Zen Garden to take you back to the warmer days of summer. How about lighting a tropical candle and putting on some Caribbean music to add even more to your enjoyment? Summer is a state of mind and now you will be able to transport yourself there any time of the year.
There is nothing better to kick off the summer than having a good old fashioned picnic. Whether you lay out a large blanket on a patch of grass or set up lunch outside on a picnic table, enjoying a meal in the great outdoors is a wonderful summer activity. This is something your kids or grandkids would love, and so easy to do.
Make sure to get them involved in picking out the menu. Bite sized finger food is best, as well as items that are not too messy. They can sit on your lap while you look online for recipes or thumb through cookbooks choosing what looks good. You could even pick a theme (a particular country’s cuisine or foods of different colors). Bring along colorful plates, napkins, cups and decorations to make your picnic a festive event. Be sure to follow food safety guidelines and teach why these are so important to follow.
If you have mobility issues or are unable to dine outside, no worries. You can set up an indoor picnic. Just spread a blanket on the living room floor and pretend you are outdoors. Inside picnics are also great when those out-of-the-blue summer rain storms show up. No need to cancel plans just because of the weather.
Mini Yearbook
With the 2015-2016 school year coming to an end, children will soon have to say goodbye to teachers and friends that they see everyday. While summer offers a much-needed break for kids, some will experience feelings of loss as they finish out the year. Collecting and organizing memories will help children work through these emotions. How about making a Mini Yearbook with your child or grandchild as a fun activity?
Create a makeshift yearbook out of construction paper to serve as a yearbook. Allow the kids to decorate their yearbook with photographs, drawings and memorabilia. Have them include their school name and year. Some ideas to include as sections for their yearbook are listed below.
- Friends that made your year better
- Favorite teacher/school employee
- Favorite subject
- Holiday celebrations at school
- Festivals throughout the year
- Dress-up days at school
- Most embarrassing moment
- Favorite day at school
- Worst day at school
- Work you were most proud of (papers, tests, etc.)
- Best compliment you got at school
- Bus ride/car ride memories
- Recess or PE memories
- Lunchroom memories
- Good deed you did at school this year
- Funniest moment at school
 With spring in full gear throughout most of the country, it is the perfect time of year to plant a special flower with the children in your life. Kids are excited to take part in the whole process of watching something bloom from a seed in a pile of dirt into a beautiful full grown flower. Let them choose the type of flower and pick the best spot for successful growth (they may also enjoy creating a chart detailing what to look for in the coming weeks) . Help them with planting, fertilizing and watering. You can also have them decorate their flower pots to make it even more personal.
Supplies
Terracotta flower pot (whatever size works for the flower chosen)
Dirt and potting soil
Flower seeds
Watering can
Acrylic craft paints and paint brushes for decorating
______________________________________________________________________________________________
Celebrate St. Patrick’s Day by making a four leaf clover mobile to hang in your favorite spot. First grab some paper and pencil and chose four different things in your life that you feel especially lucky about and write them down. Then take your pencil and trace the outline of a large four leaf clover onto a piece of thick green construction paper. Punch a small hole in the top of your clover and attach a string to hang you mobile from. With your white marker, write down your four lucky choices, with one on each leaf. Then hang your four leaf clover in a spot to remind you each day just how lucky you are.
Supplies
Paper and pencil
Thick green construction paper or poster board
White permanent market
Hole puncher
String
______________________________________________________________________________________________
Valentine’s Day is the perfect time of year to appreciate the people you love in your life and those who love you back. Making a visual reminder of how many people care is the perfect Valentine’s Day activity to share with kids and teach them about gratitude. Purchase and set up the supplies below to make the You Are Loved poster.
Supplies
A large white poster board
Colored Paper to make hearts
Heart and/or Valentine-theme stickers
A photo of you
Any photos you want to add of loved ones
Markers/Crayons/Colored Pencils
Glue/Tape
Begin by each making a list of the people you want to include on your poster. You may wish to organize names in categories such as friends, family and pets. Make the heading on your poster You Are Loved in large letters, put your photo under the heading and decorate around it. Start adding names of loved ones on cut out paper hearts (with photos if you have them). Place the hearts all around the poster in various groups, adding whatever decorations you like. When you are finished, find the perfect spot to hang up your masterpiece. Every time you walk by your poster, you will see just how lucky you are to have such love in your life!
______________________________________________________________________________________________
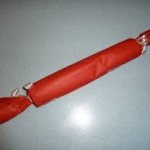
The New Year is a reminder to look ahead and see what goals you want to work on for the upcoming year. Both children and adults can share their dreams by creating an easy activity we call the “Yearly Dream Tube.” All you need is some colored construction paper, tissue paper, writing utensils, decorations (stickers, pictures, etc.), ribbon and a tube from an empty roll of paper towels.
Begin by discussing the different things you and your little one would like to see happen in the coming year. These could be small things like building a fort, reading a book you have always wanted to or starting a garden. Bigger tasks could include learning to ride a bike, taking up a new language or saving up for something you have always wished for.
Next, list these dreams on your paper including any decorations to help inspire you to achieve these goals. When completed, roll up your paper and place it inside the tube, secure tissue paper, label it and tie the ribbon around each edge to secure the tube. You can hold on to each other’s tube and take it out to share the following New Year. Then, sit down and read your partner’s list and see how many of these dreams actually came true.
______________________________________________________________________________________________
Creativity Bags
The Holiday Season is the perfect time of year to count your blessings and help someone less fortunate. The idea of giving back to those in need is a wonderful lesson to share with the children in your life. They will begin to see that giving feels so much better than receiving and what the true spirit of the holidays is all about.
Our December activity is called “Creativity Bags.” The idea is to make up bags of art and craft supplies for children who never have the opportunity to play with these items. Art supplies can last for a long time and create hours of fun and expression. Unlike giving toys that need batteries or supplying gifts that children will get bored of, arts and craft supplies are versatile and each child will be able to create something original and use the pieces inside their bag however they want to.
Find a homeless shelter, activity center or domestic abuse recovery program that accepts donations for kids. Purchase some backpacks or tote bags that can be used to hold the supplies you want to donate. Your local dollar store is perfect for picking up inexpensive art and craft items. Fill up the bag with cardboard, construction paper, envelopes, markers, colored pencils, crayons, paints, paint brushes, scissors glue, stickers, tape, pens, sharpeners and a small staple gun with staples. Also add any fun craft items like pipe cleaners, buttons, felt, cut outs, Styrofoam shapes and ribbon. You can even look around your house and see if you have any other items to add.
To really personalize it, include a short note wishing the recipient hours of creativity and fun. Let them know how much joy it was to gather all the supplies and to imagine all the wonderful creations that will come out of their bag.
______________________________________________________________________________________________
While Thanksgiving tables can be decorated in so many different designs and styles, the theme of gratitude is an important presence for all Thanksgiving celebrations. Kids love to be involved by contributing something to the festivities and making place cards is a perfect way for them to participate. Gratitude Place Cards will give your holiday table that festive look, while reminding guests just how much they have to be thankful for.
First come up with a guest list of who will be attending your holiday dinner. Get some card stock paper (thick enough that when you fold it in half horizontally, it will stand up with ease). You can get this is a fall color to match your table or white and the kids can color them. Purchase some larger sized lined index cards (4” x 6”) and write on the top of them, “3 Things I Am Thankful For.” Take each paper, fold it in half so it looks like a long place card and then attach the index card to the backside of the paper. Write the name of your guest on the front of the place card. For younger children, you can even include a picture next to the guest’s name so they can pair a name with a person. Have the kids decorate each card with stickers, dried leaves, markers or color pencils. Make sure they leave the card on the back empty for guests to fill in, but they can decorate around the border of the index card.On Thanksgiving, put the place cards on top of the plate or spot where the guests will be sitting and have pens/pencils available. As your guests arrive, have them locate their place card and ask them to fill in the back of their card and place it back on the table. During dinner, have guests take turns reading aloud what they wrote on their cards. The sharing of positive thoughts and feelings will place emphasis on the real meaning of Thanksgiving and add an extra special touch to your celebration.
______________________________________________________________________________________________
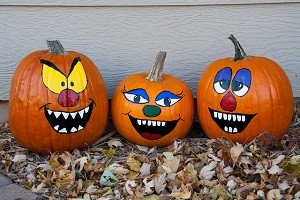
October is the perfect time of year for decorating pumpkins, but carving pumpkins is a lot of work and a real time consuming project. It is especially hard for young children since it involves sharp knives and lots of mess. You can buy fake jack–o-lanterns or pre-decorated pumpkins to spruce up your house but you will have much more fun customizing your own pumpkins with just a little effort. By drawing, painting, and decorating pumpkins, kids are able to make their own creations with little or no help. The best part is that since you aren’t opening up the pumpkin to carve it, it will last a lot longer and able to be used both indoors and out. Just put down some newspaper, play some Halloween music and have fun. Here is what you will need:
Individual Pumpkins – Everyone will want to have their very own to work on. Sometimes the miniature ones are great for little kids because they are so easy for them to handle.
Paint
Water-based paint for indoor pumpkins that the younger children make)
Oil-based paint for older children and for outdoor pumpkins
Markers
They now make paint markers which work great here but they are permanent and more for older children to use. If younger children use the washable markers, the pumpkins will be for indoor use.
Stencils
Stickers, tape, scissors, construction paper
Ribbon, yarn, pipe cleaners, feathers, etc.
Fabric
______________________________________________________________________________________________
 I have such fond memories of playing dominoes as a child. While most kids primarily used their domino sets to make elaborate courses to knock down afterwards, our family actually played the game of dominoes. It is a wonderful game because it deals with intricate math concepts in a fun and entertaining manner. Each player is given seven tiles and whoever has drawn the highest double, places it down to begin the game. Players then take turns laying matching numbers down that touch the tiles on the board. If you do not have a tile to play, you have to pick from the pile until you are able to play off of a number. The person who runs out of their tiles first wins the game. Dominoes are still sold today and sets come in either the double six, double nine or double twelve models. You can buy the traditional black and white type or opt for one of the brightly colored sets.
For younger kids, companies are now making picture-based domino games. Here instead of numbers on tiles, pictures are placed on cards and players have to match them up following the basic rules used in a game of dominoes. This is a great way to introduce the matching concept to kids not old enough to play regular dominoes. Instead of purchasing one of these picture domino game, how about making your own?
If you replicate your game after the double six domino type, you will need 36 pictures. It would be fun to use pictures of family members, pets and friends. Pick six “characters” and for each character print out six identical photos. Cut these out and place in a pile. Get plain index cards and put a black line horizontally down the middle on each of them. Then place pictures on each half of a card.
USE THE FOLLOWING EXAMPLE TO SET UP YOUR DECK:
Six characters – Mom, Dad, Grandpa, Grandma, Patty, Brandon and Fido
The Cards –36 actual cards shown below:
Mom/Mom***Mom/Dad***Mom/Grandpa***Mom/Grandma***Mom/Patty*** Mom/Brandon***Mom/Fido***Mom/Blank Space
Dad/Dad***Dad/Grandpa***Dad/Grandma***Dad/Patty***Dad/Brandon***Dad/Fido***Dad/Blank Space
Grandpa/Grandpa***Grandpa/Grandma***Grandpa/Patty***Grandpa/Brandon***Grandpa/Fido***Grandpa/Blank Space
Grandma/Grandma***Grandma/Patty***Grandma/Brandon***Grandma/Fido***Grandma/Blank Space
Patty/Patty***Patty/Brandon***Patty/Fido***Patty/Blank Space
Brandon/Brandon***Brandon/Fido***Brandon/Blank Space
Fido/Fido***Fido/Blank Space
Blank Space/Blank Space (this is the double blank card)
In the regular game of dominoes the highest double card is played first. Since there are no numbers in picture dominoes you could set the value as ages – so Grandma or Grandpa would be the highest card played. You could also follow the same pattern and introduce more characters to your set (just remember to pair each new character with every other character as well as including a double and one with a blank space). For those new to the game, here is a link explaining the basic game of dominoes (including setup and rules). https://www.dominorules.com/the-basics
______________________________________________________________________________________________
Smell – Maybe you are lucky enough to have experienced walking down a seaside boardwalk with all the scrumptious aromas of your favorite summer treats. Vendors often use fans circulating those tempting smells to walkers who pass by. So many delicious foods vying for your olfactory attention. Also noticeable around town are the wonderful fragrances from local flowers sharing nature’s perfume throughout the summer season. What are the smells that bring your back to this time of year?
Taste – Sweet succulent corn, juicy ripe watermelon and iced cold lemonade are just some of the tastes that are synonymous with summer. It is all about cool and refreshing as well as light and easy. Outdoor barbecues with friends and family are what many of us enjoy during the season. Who wants to light the oven and heat up the house when the thermometer outside is rising? What are the foods and beverages that get your taste buds thinking about summer?
Touch – How wonderful it is to experience the smooth sensation of sand between your toes or the sun’s warming rays against your skin? We can all relate to the feeling of diving into the refreshing water of the ocean or backyard pool as well the cool breeze that follows a summertime thunderstorm. These are just a few of the tactile moments that make us love this season and hold close their memories during the long cold months of winter. What feelings do you associate with summer?
With the summer months upon us, many kids have hours of free time in which they need to occupy themselves. It is the perfect season to introduce a new skill and share some memorable moments with the children in your life. Cooking is a wonderful activity and can be adapted for all ages and interests.
According to author and food activist Michael Pollan, “Cooking [from scratch] is the single most important thing we could do as a family to improve our health and general well-being.” It is never too early to include children in this activity and to get them helping in the kitchen. A child who cooks will likely grow up to be an adult who cooks. By presenting food preparation as a fun thing to do, you can be that positive influence that helps develop healthy lifelong habits.
To get your young chefs excited about working in the kitchen, go to your local discount or craft store and buy some child-sized plain white aprons and some fabric paint. Let them design and create their own aprons that they will be wearing all summer long. Depending upon the age of the kids, you may also want to purchase some inexpensive small and lightweight cooking utensils that are easier to use with little hands.
Whether you choose a recipe from a cookbook, online or one of your own family specialties, make sure to get the children involved in the whole process. Have them shop with you to buy the ingredients and plan the menu. With going through the list of recipe instructions and measuring, cooking is such a great activity to utilize both reading and math skills. Take pictures of all the steps that go into making a meal to document the magical transformation that takes a pile of ingredients in a shopping cart to the finished product of a wonderful meal. You can even have the kids design and print out the menu as well as setting and decorating the table. By being involved from start to finish, they will really get the feel of what goes into planning out and cooking a meal. Like in every home, unfortunately, the real challenge will be in helping them clean up afterwards! Good luck and happy cooking.
Here are a few menu suggestions to get you started:
Taco Time – Have both the hard and soft shells available and spread out numerous fixings so everyone can enjoy their favorite combination. The sky is the limit here. Kids will love to use their hands and build the taco of their dreams.
Pasta Night –Include a few different sauces and toppings in separate bowls to create the perfect al dente’ masterpiece – pair it with a side salad or vegetable to complete the meal
Shish-Kebob Fun – This is especially great for barbeque cooking. Kid love to design their own creation and then assemble it themselves on a skewer. There are also endless choices for marinades.
______________________________________________________________________________________________

Create a Cinquain poem –
It is believed that Spring is the season for poetry. Now that the weather is finally warmer, it is the perfect time to grab a spot under a shady tree and write a poem with that special child in your life. Follow these quick and easy steps to create what is known as a Cinquain poem.
In the early 1900s, Cinquain Poetry was created by Adelaide Crapsey and her style of poems consisted of 5 unrhymed lines. The original version has a specific number of syllables in each line but the following activity is a simplified version. For younger children, you may need to help them organize and write it down
Five Easy Steps:
- Write the name of a person as a title for your poem.
- One line 1, write two descriptive words about what your person looks like.
- On line 2, write three positive words describing this person.
- On lines 3 and 4, write a short phrase describing how this person affects family or friends in a positive way.
- On line 5, write one word that best describes this person.
Arrange your poem as follows:
- Title
- Line 1
- Line 2
- Lines 3 and 4
- Line 5
______________________________________________________________________________________________
| Small voices,big ideasWe are in the time of the year when “politics” are everywhere. Between the television ads bombarding us with promises from candidates and with endorsement flyers being attached to front doors and mailboxes, kids are also quite aware of the political environment. It is the perfect time to show the younger generation that their individual voices are important. |  |
What better way for kids to express their political views and questions than to have them write a letter to the President? Even though they are not able to participate in the election process as a voting citizen, their opinions are valuable and can be easily communicated.
Set up a quiet area with stationary, pens, envelopes and stamps. Begin by discussing general topics about government, the country and the world. See what specific subjects come up and what related issues are on the childrens’ mind. Have them pick one question or comment that is especially meaningful and write this to the President (there is a much greater chance of the letter actually being read and answered if it is short and concise). You may have to write letters out for younger children, but be sure to let them sign it themselves. This personal touch is very important. Make a copy of the letter too.
This is a wonderful introductory lesson in the democratic process of our country and reinforces the idea that all voices count. Just imagine how exciting it will be if a letter comes back from the White House addressed to your little citizen! Be sure to save both the envelope and letter (containing that official Oval Office Seal). It will be something they’ll want to save forever and maybe even show it to their own kids someday.
Send letters to: The White House 1600 Pennsylvania Avenue Washington, DC 2055
______________________________________________________________________________________________
Flashlight fun
Kids love playing with flashlights, and the following idea adds color to an already favorite activity. You will need some flashlights (the more the better), various color balloons and some rubber bands. Stretch the balloons over the flashlights and secure with the rubber bands. Darken a room and have participants shine their flashlight on the walls and ceilings. By combining different balloon “filters” on the flashlight, you can create different color combinations. You can also have multiple kids shine their flashlights on one spot to alter colors. This activity is a great way to teach the concept of primary and secondary colors while having a bunch of fun.
______________________________________________________________________________________________
Mixed-up animal masks
 With Halloween right around the corner, it’s the perfect time of year to sit down and make some unusual masks with the kids in your life. Just cut a mask’s template out of cardboard and fasten a string or elastic around the back of it. For younger children you may choose to attach a large popsicle stick underneath the mask instead, so the child can easily hold it up to his/her face. Have different types of animal ears, eyes, noses, mouths, hair and other accessories available for everyone to pick from. Then all participants are asked to “make up” an animal by combining mixed-up parts from the table they are sitting at. Come up with a silly animal name for your creation and don’t forget to share your animal’s characteristics with the rest of the group. Let the imagination flow. You’re sure to have some interesting creations.
______________________________________________________________________________________________
You can make a difference
How do you answer a child when he/she asks, “Why doesn’t someone pick up all this trash?” Wouldn’t you like to show the child it is possible to be that someone? You can! First find a location that needs cleaning up, (an area close to your home, a neighborhood playground or school area). Then pack plenty of drinking water, lots of large trash bags, rubber gloves, anti-bacterial hand wipes and maybe even a garbage pick. You may want separate containers for recyclable items as well. Start the clean-up early in the day when the sun isn’t so strong, put on some energetic music and have fun. Take “before and after” pictures as documentation of your effort. End the morning with a hearty lunch at the child’s favorite place.
______________________________________________________________________________________________
Utensil puppets
 A fun and easy way to make puppets is as close as your kitchen drawer. The shape of ordinary spoons and forks are perfect for the base of silly and unusual puppets. They have built in handles for small fingers and can be moved around easily. Larger serving spoons can also double as giant puppets. You’ll need supplies such as yarn, construction paper, tin foil, cotton, tape and twist ties to decorate your puppets. You may want to try “edible” decorations for your creations to get your artists to eat, (cooked spaghetti makes great hair). And remember to keep this in mind when working with kids – the sillier the better !!
______________________________________________________________________________________________
Adopt a tree
If you regularly go to a park or playground, here is a great activity to do with a child to celebrate Arbor Day. Have  him/her pick out a favorite tree and “adopt” it (be sure to let them know that none of us can really own a tree.) He/she can give it water and start a journal of the tree’s characteristics such as changes in leaves, flowers and overall growth. The child can also take notice of the insects that live there. Have them take pictures with their tree. It may be fun to put together a photo album documenting all these changes. Kids will begin to learn to care for their environment.
______________________________________________________________________________________________
How many days?
During the holiday season, kids have a hard time waiting for that special day to arrive. Help them  count down the days to Christmas or Hanukkah by working together on a special holiday calendar. Purchase large sheets of construction paper and poster board. Make a blank calendar grid on the poster board and the same size grid on the construction paper (this second calendar will have filled in the dates of December). Cut these days into flaps and attach to the poster board. Place drawings, photos and other special day reminders under the flaps. Each day the kids can rip off a flap and watch their excitement build.
______________________________________________________________________________________________
The nose knows
Set out 10 or so plastic plates and dish out small amounts of food with distinctive smells. Blindfold  participants and see if they can guess the mystery odor. For example, place a dab of peanut butter, pinch of cinnamon or slice of banana out. For the older child you may want to combine substances to make it even harder (pour vinegar over an orange). Then try putting out an empty dish and see what guesses the kids come up with. Make sure to end the game with a great smelling snack.
______________________________________________________________________________________________
Scavenger hunt
Get a pad of Post-It notes (those small papers with the temporary adhesive on them) to use for the  clues. Start with your first location and write a clue guiding the person playing to the next spot (it may say for example, “you will find the next clue where we keep the telephone book”). The amount of notes written depends on how long you want the game to go on for and the age of the children playing. Make sure to put a prize at the final destination and happy hunting.
______________________________________________________________________________________________
Play ball!
 With June being the official start of the summer season, it is the perfect time to spend a lazy afternoon watching a baseball game with friends and family. To get the younger ones involved in the game, set up a makeshift scoresheet and teach them how to tally it up. The symbols and format you use will depend on the age of the child. Have plenty of snacks on hand and lyrics ready to sing “Take Me Out to the Ballgame” during the 7th inning stretch.
______________________________________________________________________________________________
Mi casa su casa
Each person should have a large piece of drawing paper and crayons, pencils or markers for  sketching. Have the adults draw the house they grew up in (if they lived in more than one house, the one that has the most meaning). Have the kids draw the house they live in (or the one that means the most to them). Compare pictures, see what is similar and different and discuss important memories.
______________________________________________________________________________________________
Guess who’s coming to dinner
 Have family members sit around the table with pencil and paper. Pretend you are planning a very unusual dinner party. At this dinner, each person can invite only three people (past or present) to attend. Who would you choose? Can you guess who the others would invite? Share answers, then try to figure out seating arrangements.
__________________________________________________________________________________________
Cynthia Lopinto
Latest posts by Cynthia Lopinto (see all)
- Honey Chocolate–Covered Pretzels - April 3, 2018
- True Colors - April 3, 2018
- Spring Cleaning…You’ve Gotta Be Kidding - April 2, 2018
- Should You Stay In Your Home Or Move During Retirement? - April 2, 2018
- Hawaiian Plants For Good Health - April 2, 2018
 Home Front Magazine A Publication for Seniors


